Number Porting
Transfer your existing phone numbers from another carrier into CallScaler.
Overview
Number porting lets you transfer phone numbers you already own from another carrier into CallScaler. Your numbers continue working with your current provider during the entire transfer process. Most ports complete in 7-14 business days.
Do not cancel service with your current carrier until the port is fully completed. Canceling early can cause your numbers to be lost.
What You Need
Before starting a port request, gather the following from your current provider:
If you don't have this information handy, use the template below to request it from your current provider.
- •Your account number with the current carrier
- •Your account PIN or password (used for verification)
- •The authorized account holder name (must match exactly)
- •Your billing address on file with the carrier
- •A recent bill or invoice (PDF or image) showing the numbers and account details
Request Info from Your Provider
Send this to your current carrier's support team to get everything you need for porting:
Submit a Port Request
Once you have your account details:
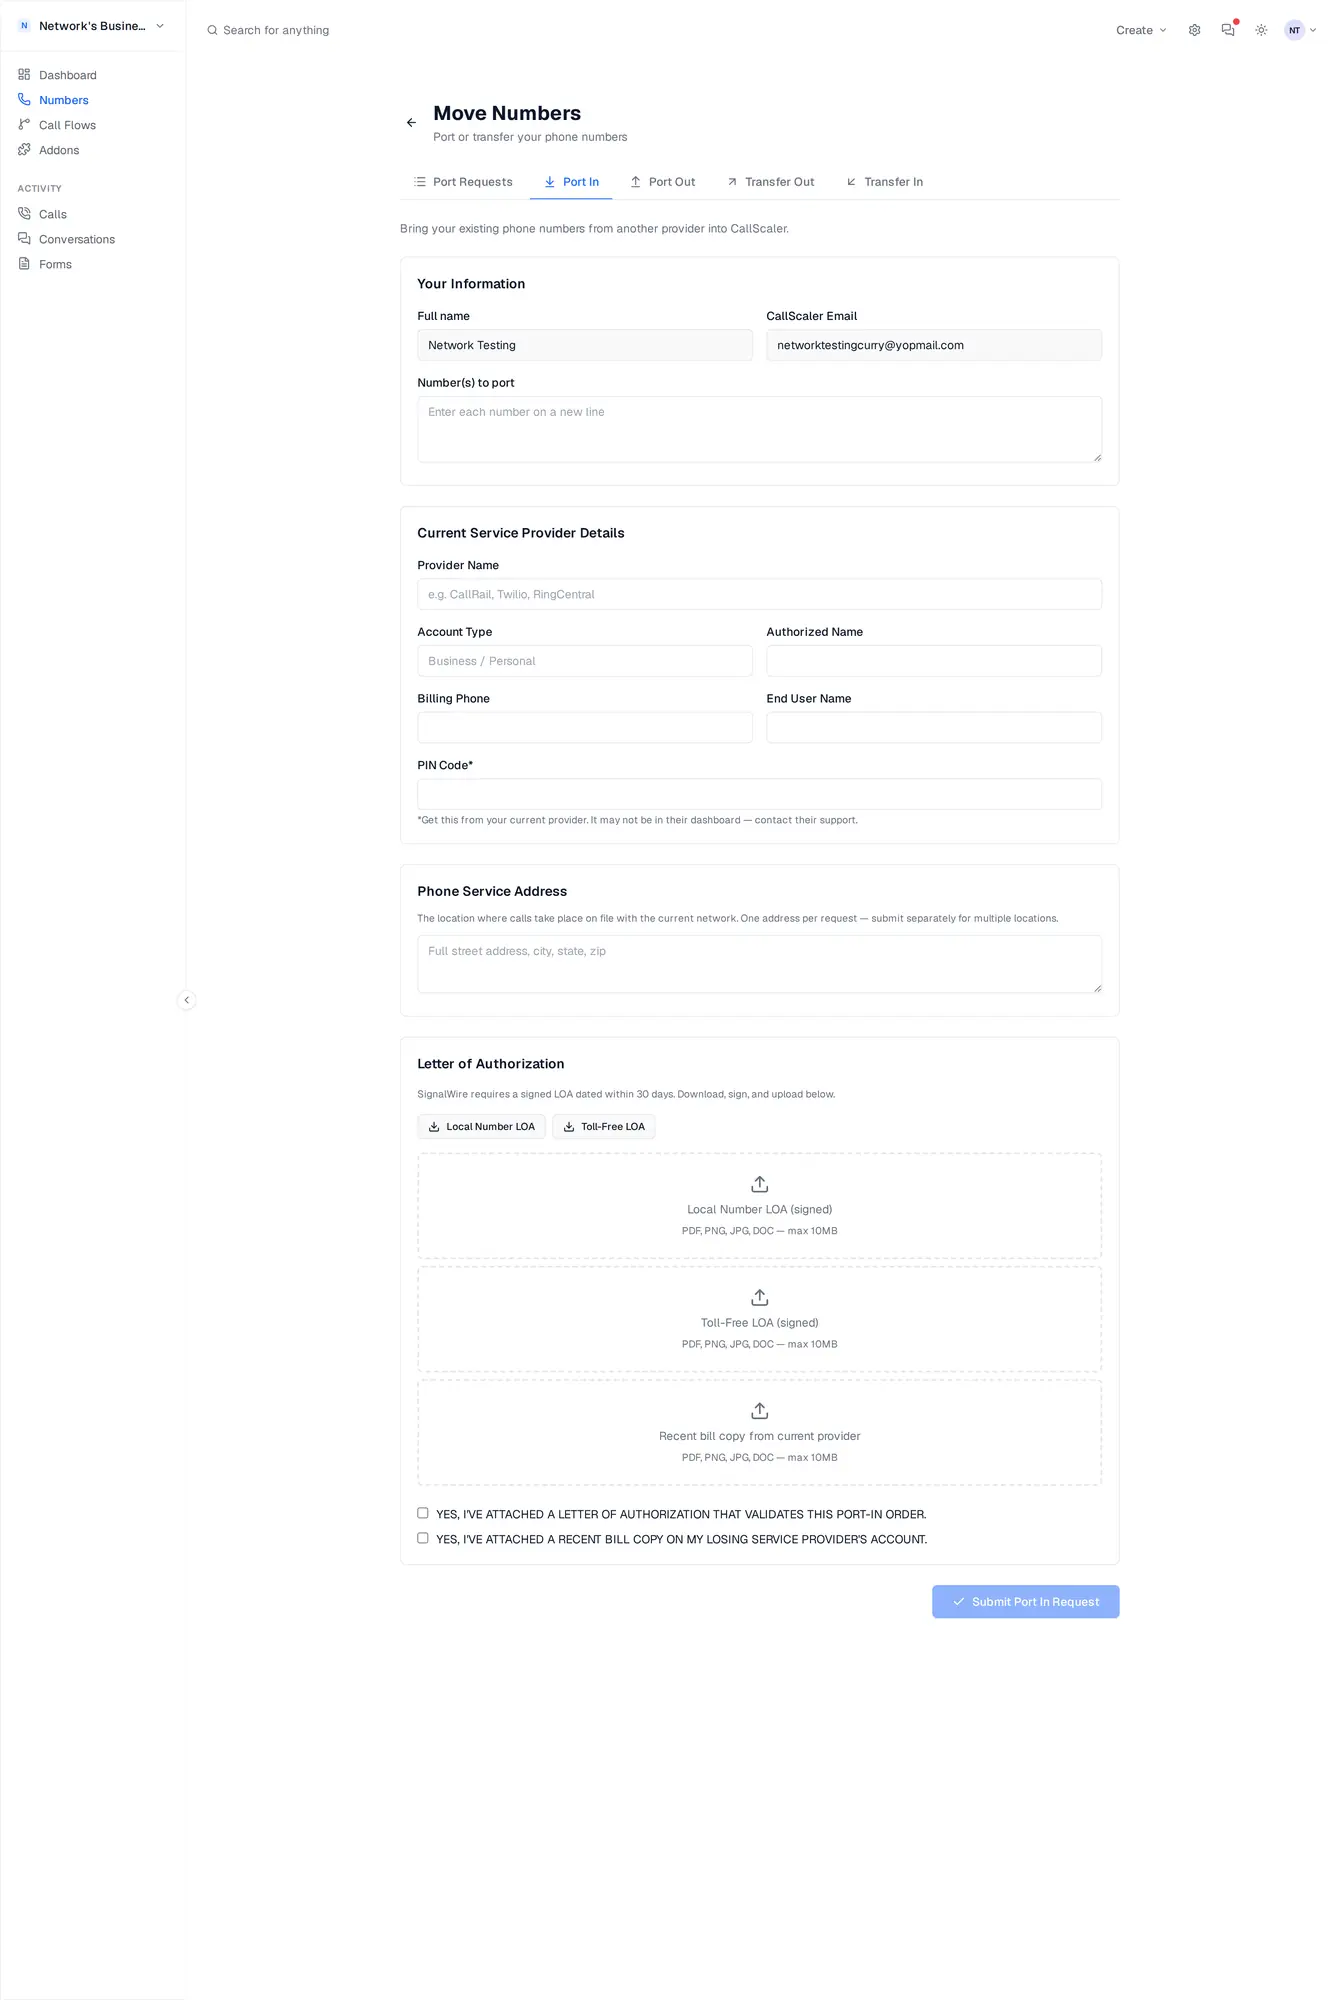
1. Go to Numbers → Move Numbers.
2. Select the Port In tab.
3. Enter the phone numbers you want to transfer.
4. Fill in your current carrier's account details.
5. Submit the request.
Upload Documents
The Letter of Authorization section is at the bottom of the Port In form:
1. Download an LOA template — Local Number LOA for standard 10-digit numbers, Toll-Free LOA for 800/888/877/866/855/844/833 numbers. Print, fill in your account details, and sign (LOA must be dated within 30 days).
2. Upload the signed LOA back into the matching drop zone (PDF, PNG, JPG, or DOC — max 10MB).
3. Upload a recent bill copy from your current carrier into the third drop zone. The bill must show the numbers being ported and your account information.
4. Check both confirmation boxes to enable the Submit button.
The name on the LOA must exactly match the authorized name on your current carrier account. Mismatches will cause the port to be rejected.
Track Your Port
After submitting, you can track the status of your port on the same Move Numbers page. You'll see status updates as the port progresses:
1. Submitted — Your request has been sent to the carrier.
2. FOC Received — The carrier confirmed a transfer date. Your numbers are automatically added to your account at this point.
3. Completed — Numbers are live on CallScaler.
You can also exchange messages with the porting team directly on this page if there are questions or issues.
After Porting Completes
Common Issues
If your port is rejected, the most common reasons are:
- •Name mismatch — The name on the LOA doesn't match the account holder name at your current carrier. Contact your carrier to verify the exact name on file.
- •Missing PIN — Some carriers require an account PIN for port-out authorization. Call your carrier to set or confirm your PIN.
- •Account has a contract — Early termination fees or contracts can block a port. Check with your carrier about any obligations.
- •Incomplete LOA — All fields must be filled out and the document must be signed. Re-download, complete, and re-upload.
Porting Out
If you need to transfer numbers out of CallScaler to another provider:
1. Go to Numbers → Move Numbers.
2. Select the Port Out tab.
3. Fill in your details and submit the request.
Your new provider will initiate the port on their end. There is a $10 per number port-out fee. Numbers remain active on CallScaler until the port completes.
Port-out fees are $10 per number and are charged to your account balance when the port is processed.
On this page