How to install CallScaler’s DNI javascript snippet on your website

QUICK ANSWER

Copy the script from your CallScaler number pool and put the script before the closing </head> on your website.

This will let you dynamically swap your phone number with a call tracking number from CallScaler so you can accurately track the source of calls from your website.

Introduction

Dynamic Number Insertion (DNI) is a powerful technology used by call tracking software providers, like CallScaler, to enhance marketing efforts and customer experience. By installing a simple JavaScript snippet, businesses can dynamically change phone numbers on their websites based on the source of the visitor. This enables precise tracking of call sources, leading to better marketing insights and improved customer interaction.

Benefits of Dynamic Number Insertion

  1. Enhanced Call Tracking: Track which marketing efforts are driving calls to your business.
  2. Personalized Customer Experience: Show local or toll-free numbers based on the visitor’s location.
  3. Improved Marketing Insights: Understand which keywords, campaigns, or channels are most effective.
  4. Seamless Integration: Works effortlessly with your existing website and analytics tools.
  5. Real-Time Data: Gain immediate insights into customer interactions and preferences.

Where to find your code snippet

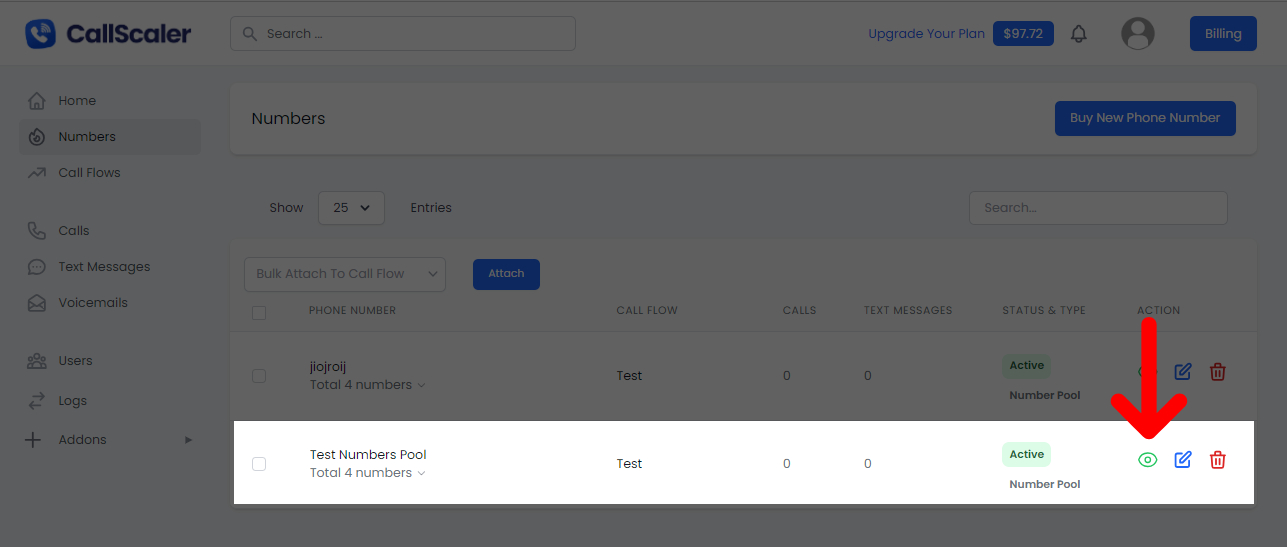
After you create your number pool, navigate to the numbers page in the sidebar. Click the icon shown below to find your code snippet. After clicking that, a popup will come up and you can copy your code snippet.

Where you get your code snippet


Step-by-Step Guide to Install JavaScript Snippet

For WordPress

  1. Log into WordPress Dashboard: Navigate to your WordPress admin panel.
  2. Access Theme Editor: Go to ‘Appearance’ > ‘Theme Editor’.
  3. Edit Header: Locate the ‘header.php’ file. Insert the CallScaler JavaScript snippet just before the closing </head> tag.
  4. Update File: Click ‘Update File’ to save your changes.

Note: If you use a child theme, ensure you’re editing the child theme’s header file.


For Wix

  1. Access Wix Editor: Log into your Wix account and select your site.
  2. Go to Settings: Navigate to ‘Settings’ in the site’s dashboard.
  3. Insert Code: Click on ‘Custom Code’ under ‘Advanced’. Paste the CallScaler JavaScript snippet in the ‘Head’ section.
  4. Publish: Save and publish your site to apply the changes.


For Webflow

  1. Log into Webflow: Access your Webflow dashboard.
  2. Open Project Settings: Click on your project and go to ‘Settings’.
  3. Custom Code Section: Navigate to the ‘Custom Code’ tab. Paste the CallScaler JavaScript snippet in the ‘Head Code’ section.
  4. Publish: Click ‘Save Changes’, then ‘Publish’ to apply.


For Squarespace

  1. Squarespace Login: Enter your Squarespace dashboard.
  2. Access Settings: Click on ‘Settings’, then ‘Advanced’.
  3. Insert Code: Select ‘Code Injection’. Paste the CallScaler JavaScript snippet in the ‘Header’ field.
  4. Save: Click ‘Save’ to implement the changes.


Conclusion

Installing the CallScaler JavaScript snippet for dynamic number insertion is straightforward and can significantly enhance your marketing and customer service efforts. By following these steps for your specific platform, you can start leveraging the power of call tracking to optimize your business strategies.

Get call tracking numbers for only $0.50/mo
Easy call tracking. Scalable pricing.
TOP RATED
Ready to get your first call tracking number?

Risk free for 14 days!

LIMITED TIME OFFER

Watch a demo of CallScaler & get $25 in free account credit

Included in CallScaler: